A Shiny Dashboard Template Modular System with Chat Bot Support.
A Shiny Template System
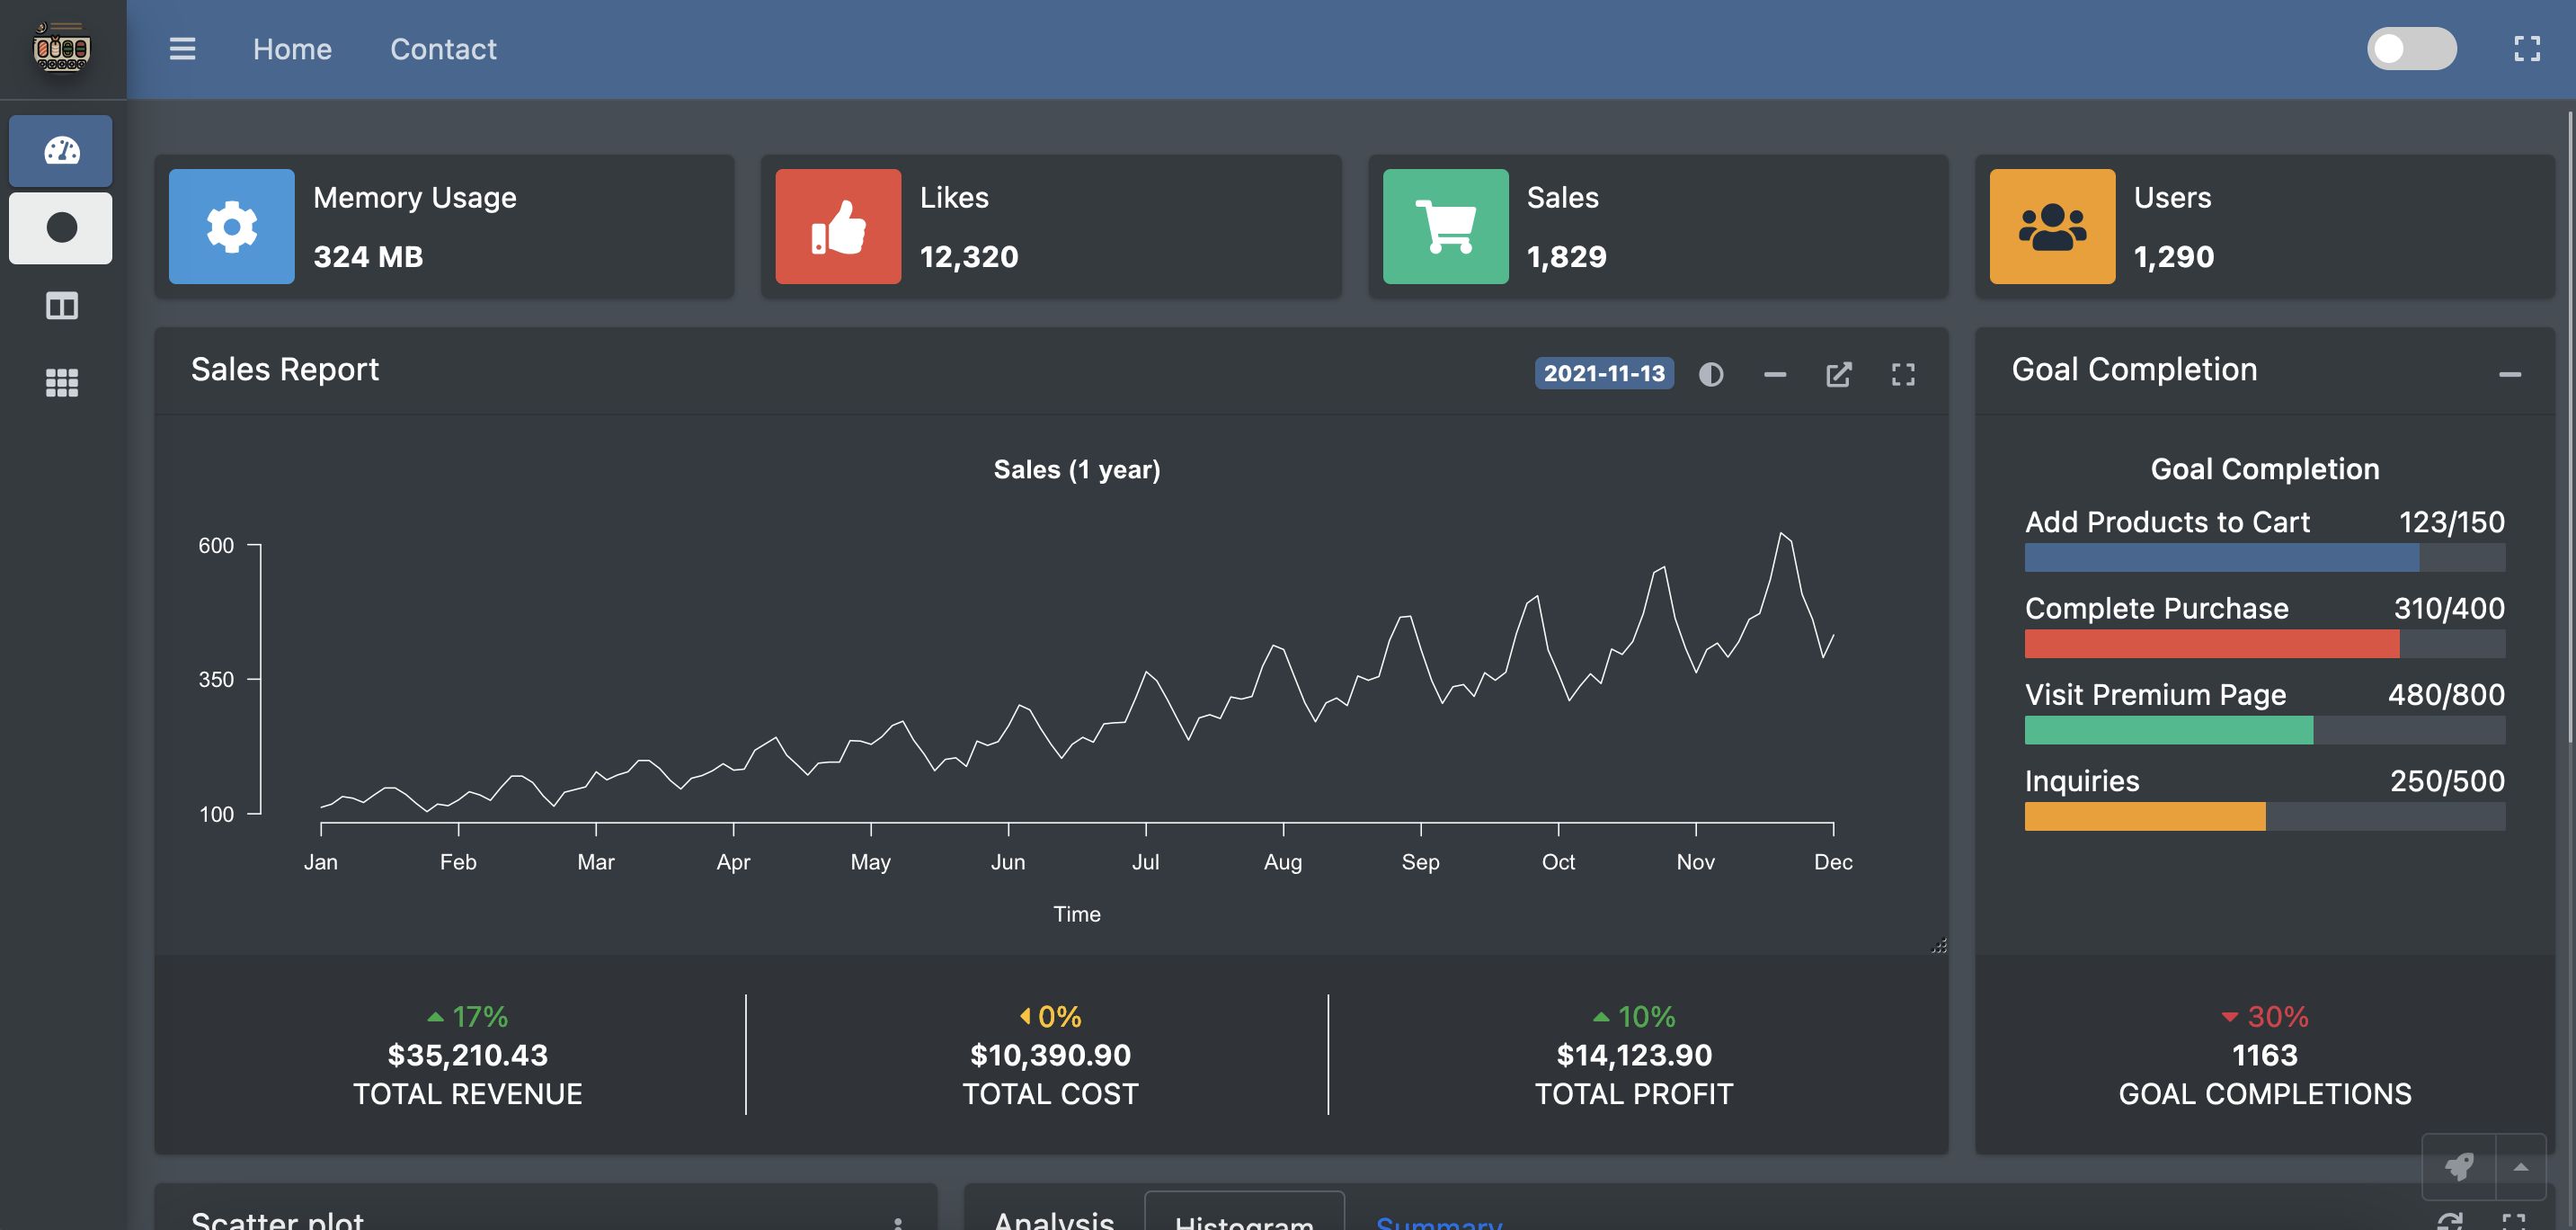
![]()
The goal of shidashi is to provide framework for R-shiny templates, especially for dashboard applications.

Installation
You can install the released version of shidashi from CRAN with:
install.packages("shidashi")
Demo & Tutorial Application
The demo app requires to install the following extra packages
install.packages(c("ggExtra", "rmarkdown"))
Once you have installed these packages, run the following command from R:
library(shidashi)
project <- file.path(tools::R_user_dir('shidashi', which = "data"), "AdminLTE3")

# `use_template` only needs to be called once
use_template(project)
render(project)
Start From Existing Templates
To start a shidashi project, open RStudio menu from the navigation bar:
File > New Project... > New Directory > Shidashi Shiny Template (*)
*You might need to scroll down to find that template option.
Please enter the project information accordingly. By default, the Github user is dipterix, and theme is AdminLTE3, which lead to the default template.
Bare-bone Template
If you want to start from a bare-bone template, change the theme option to be AdminLTE3-bare.
File Structure
A typical shidashi project has the following file structure:
<project root_path>
├─modules/
│ └─<module ID>           - Module folder; folder name is module ID
│   ├─R                   - Module functions shared across UI and server
│   ├─module-ui.html      - Module HTML template
│   └─server.R            - Module-level server function
├─R/                      - Common functions shared across modules
├─views/                  - Small snippets (see `?include_view` function)
├─www/                    - Static files: css, js, img, ...
├─index.html              - Template for homepage
├─modules.yaml            - Module label, order, icon, badge..
└─server.R                - Root server function, usually no modification is required
Contribute
Create your own Github repository with name shidashi-templates. Add folders named by the themes. Then people can install your themes as templates through RStudio. An easy start is to fork this repository.