NixOS configuration
NixOS configuration is a flake output type which describes a NixOS operating system for a specific system.
NixOS modules is a different flake output type which is useful for organizing and reusing NixOS settings. NixOS configurations can import NixOS modules, but cannot import other NixOS configurations. It is therefore recommended to generally use NixOS modules, and use NixOS configurations to declare a specific system configuration, while relying on imports of NixOS modules, see Imports.
If you wish to build e.g. a cloud server image or embedded server image, check out NixOS generate output.
How to create a NixOS configuration
Step 1 - Create your flake
Create a flake by signing in to MyNixOS, and then navigate to the create flake page.
On the flake create screen, enter an appropriate name, then click "create".
You should now see the name of your flake in the flake selector to the upper right on your screen.
A flake is a software configuration unit specific to the language Nix. Each flake has a set of inputs and outputs. Your NixOS configuration will describe an output in your flake. Note that your flake can have many outputs of different types at the same time. The inputs of your flake are locked to exact versions when you release your flake, which makes your configuration reproducible.
Step 2 - Create a NixOS configuration output
- Navigate to the flake outputs screen by clicking the flake selector to the top right of the screen, then select "Outputs" to the left on the flake screen.
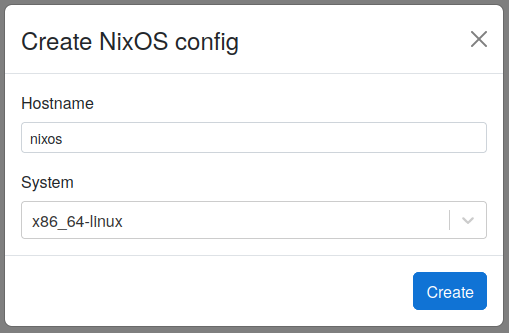
- From the flake outputs screen, select "Add output" → "NixOS configuration".
- In the "NixOS configuration" dialog, select a name and your target system, then click "Create".
In this example, we usenixosas the name andx86_64-linuxas the system.
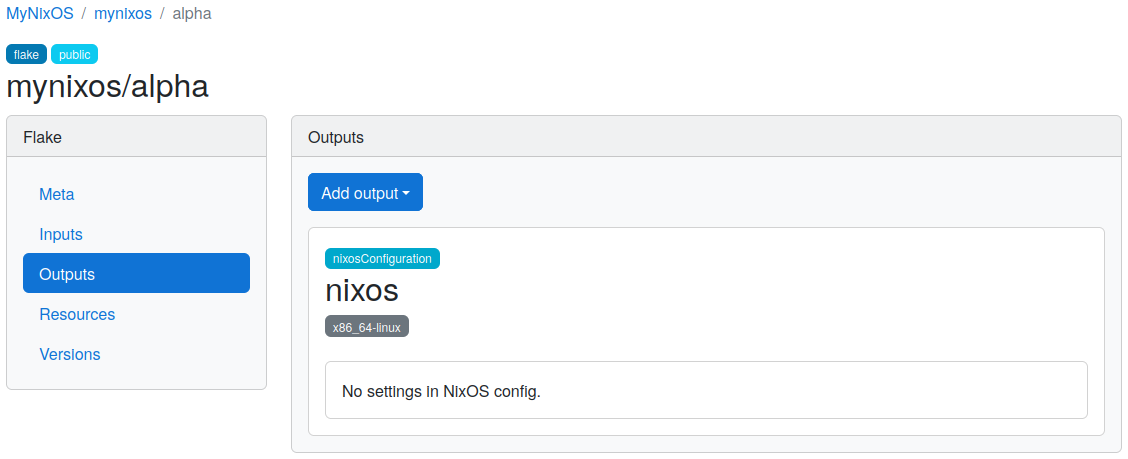
Your NixOS configuration should now be shown as an output in the flake output screen.
Step 3 - Configure the NixOS configuration output
As part of our configuration, we will add the following settings to the NixOS configuration:
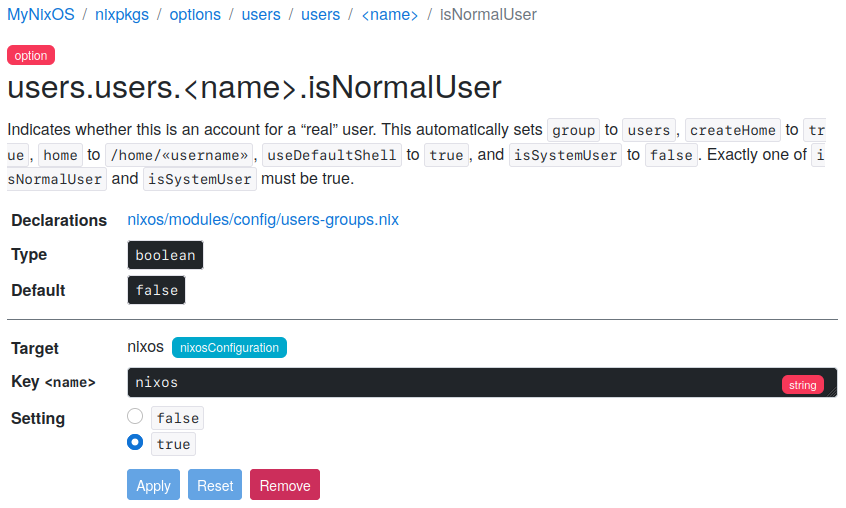
- Set
users.users.<name>.isNormalUsertotruefor the keynixos.
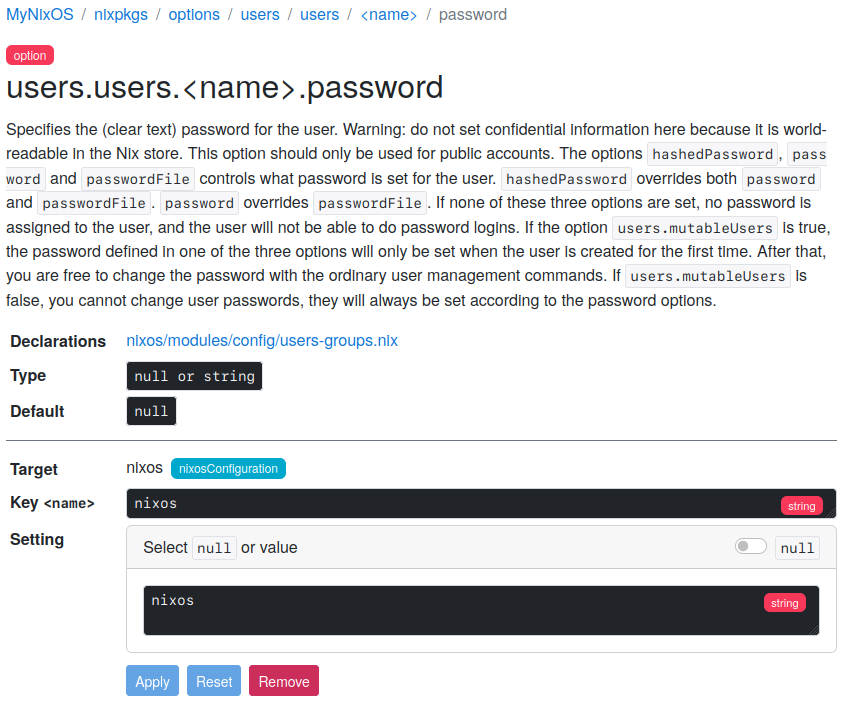
This will enable a user account with usernamenixos. - Set
users.users.<name>.passwordtonixosfor the keynixos.
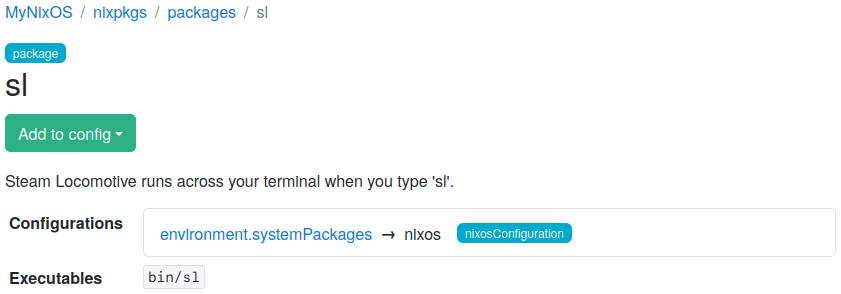
This will set the password for thenixosuser tonixos. - Add the
slpackage to the configuration.
This will make thesltool available as a system package in our configuration.
Never configure sensitive passwords in plaintext.
Instead, use the users.users.<name>.hashedPassword option with a hash of a password with sufficient entropy.
Step 4 - Test the NixOS configuration
If you are using NixOS, the NixOS configuration can be tested as below - otherwise, see Release and Install.
- Navigate to the flake versions screen (Click the flake selector, then select "Versions").
- Click "Release" to create a version of your flake (Learn about releases)
When the release is ready, a new version entry appears in the listing on the flake versions page. - Copy the "Latest" flake URL from the flake versions screen.
- Run
nixos-rebuild build-vm --flake <latest-flake-url>#nixoswith the URL and#nixosfragment. - Run
./result/bin/run-nixos-vm - Log in with username
nixosand passwordnixos.
Congratulations! You are now running a NixOS operating system defined as a flake.
To celebrate, run the sl command.